Overview of Portainer: An easy tool to manage your Docker containers


What is Portainer??
Portainer is an easy-to-use management tool that lets you manage various Docker environments. It offers a simple and easy way to manage Docker containers and Swarm services from a web interface. The Portainer application allows you to manage Docker containers, such as creating and deleting Swarm services, granting access approvals, executing commands in the console of running containers, and viewing their logs. With a self-service management portal like portainer, you can deliver containerized applications from the data center out to the edge and accelerate the adoption of Kubernetes and Docker.
In this article, we will have a look at the overview of the Portainer application so you can begin using it immediately with your projects
How To Install Docker
Installing on Windows
Windows 10 Pro is the best option for those who wish to take the advantage of the Windows Linux subsystem. If you're using a work computer with a lot of options disabled, you might have some trouble, but don't give up, ask for help if you need it.
You can download docker from here. Make sure you select the "stable versions".
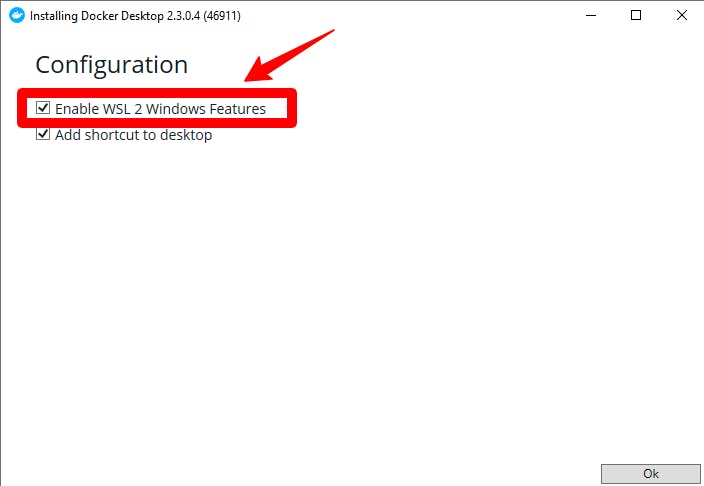
Download and run the installer. Be sure to choose WSL (Windows Subsystems for Linux).
Restart Windows after installation is complete.
Installing on Linux
Docker is best suited to a native Linux environment due to its superior performance. For installation, you will need to follow the instructions on the Docker website due to the numerous Linux distributions and platforms that you may be running it on. This web page contains links to distribution instructions.
Installing on macOS
Docker Desktop for Mac can be downloaded and installed from the following website. Be sure to download the stable version. When the Docker application is downloaded, open the .dmg installer file and drag it to the Applications folder, as shown here.
Installing Portainer
The commands below will work regardless of the operating system you're using. Using a terminal or command prompt, create a portable_data disk by running the following command
docker volume create portainer_data
Using the above command, Portainer creates a data volume on your hard drive which will store your configuration data. In the absence of it, data would be stored in the container and lost every time it restarted.
Startup the Portainer container by running the following command.
docker run -d -p 8000:8000 -p 9000:9000 --name=portainer --restart=always -v /var/run/docker.sock:/var/run/docker.sock -v portainer_data:/data portainer/portainer
Connecting to Portainer
The installation of the Portainer was easy, and connecting to it was no different. Launch your web browser and go to localhost:9000
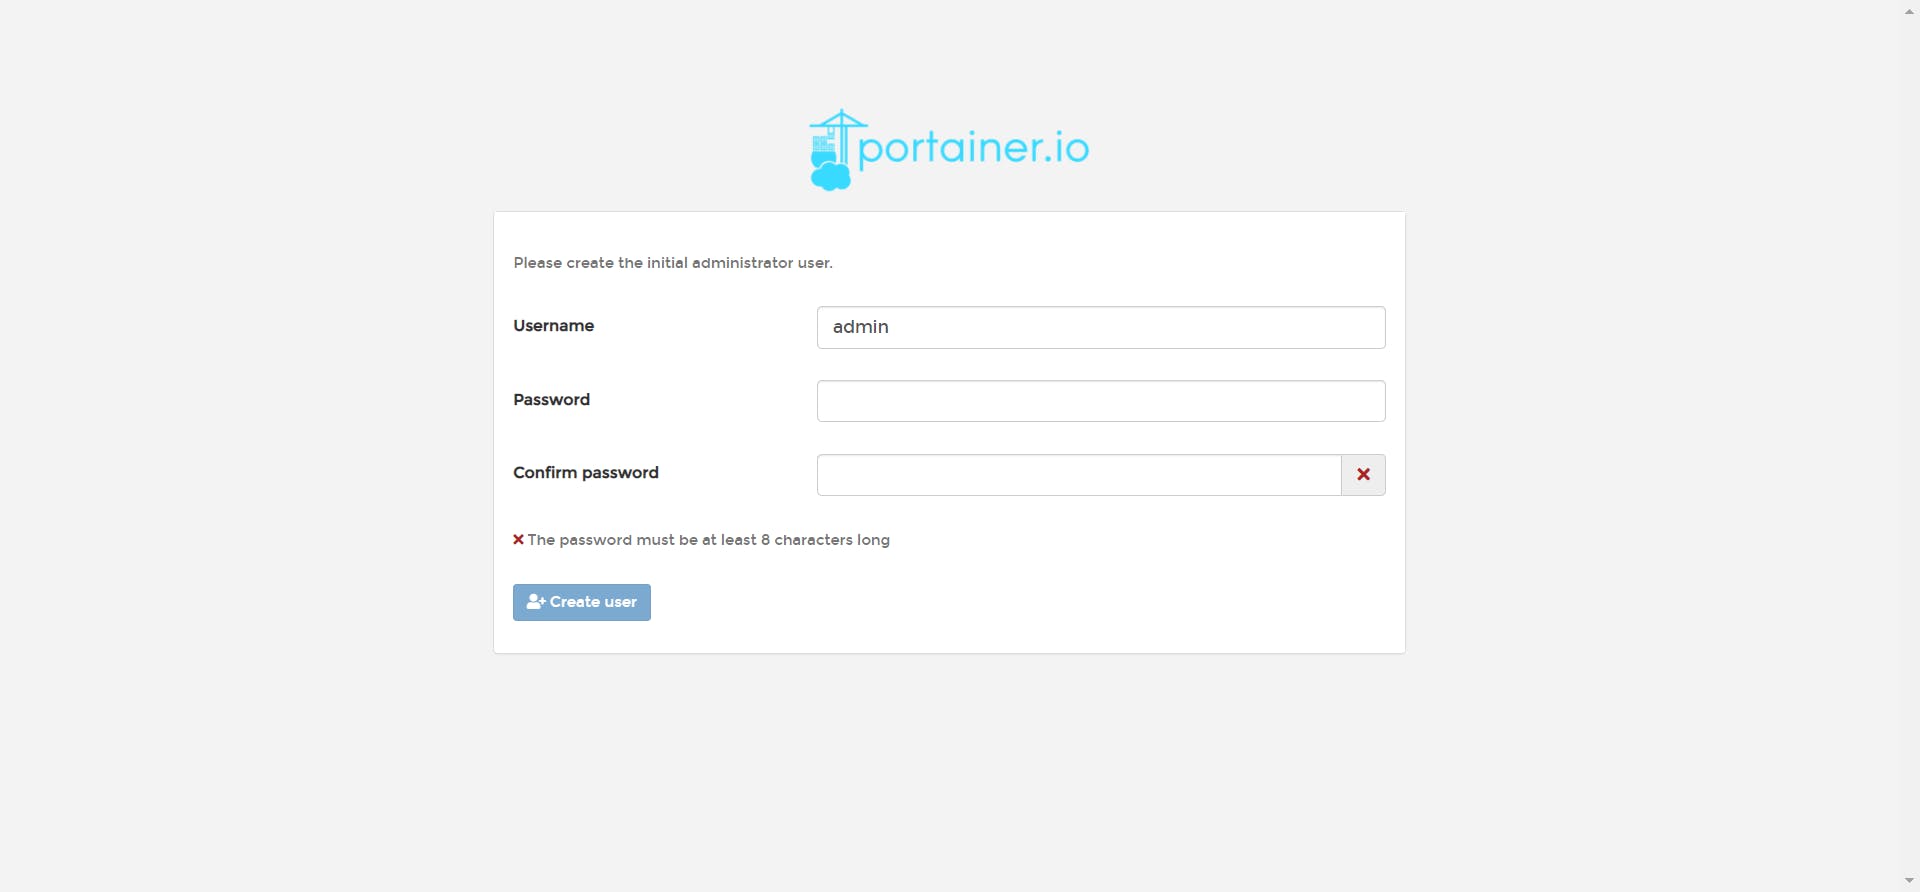
The default user name is admin as this is the first time you have logged in, you will be asked to create a new password and confirm it.
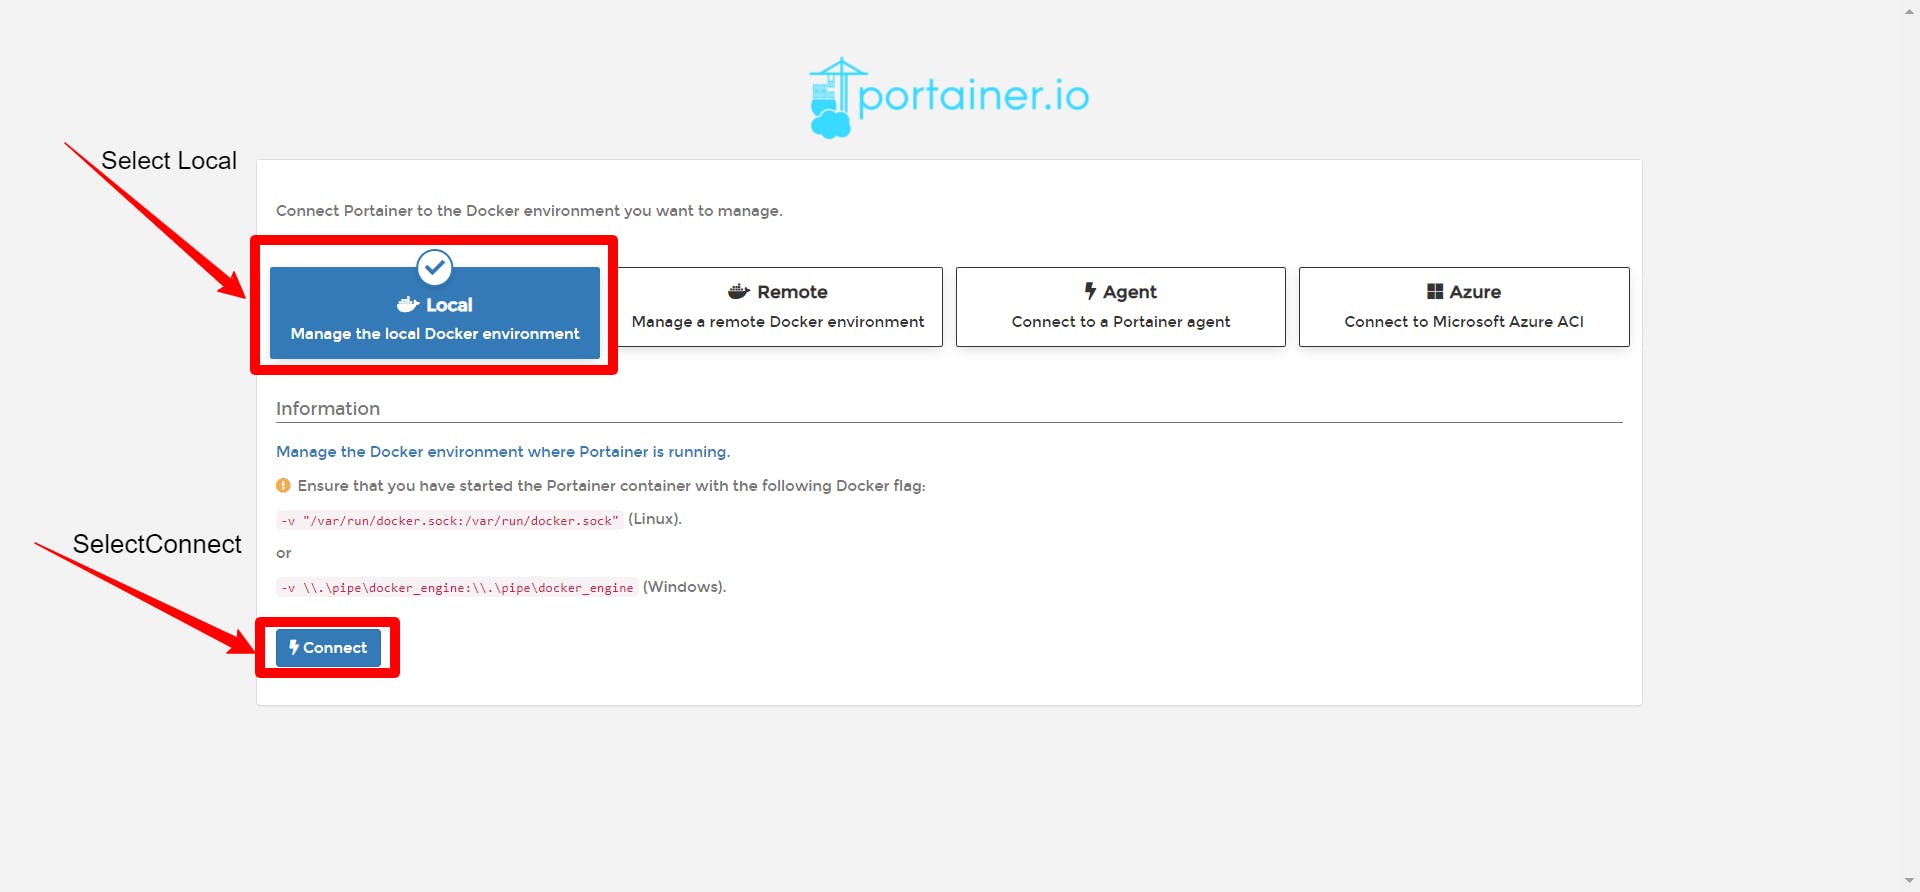
On the next screen, select Local and click Connect
The Portainer Home Screen UI
A central portion of the screen displays the Docker instances Portainer knows about. For now, there is just one instance, "local". On the left side are options that are similar to those that are available from the Docker command line, plus many more.
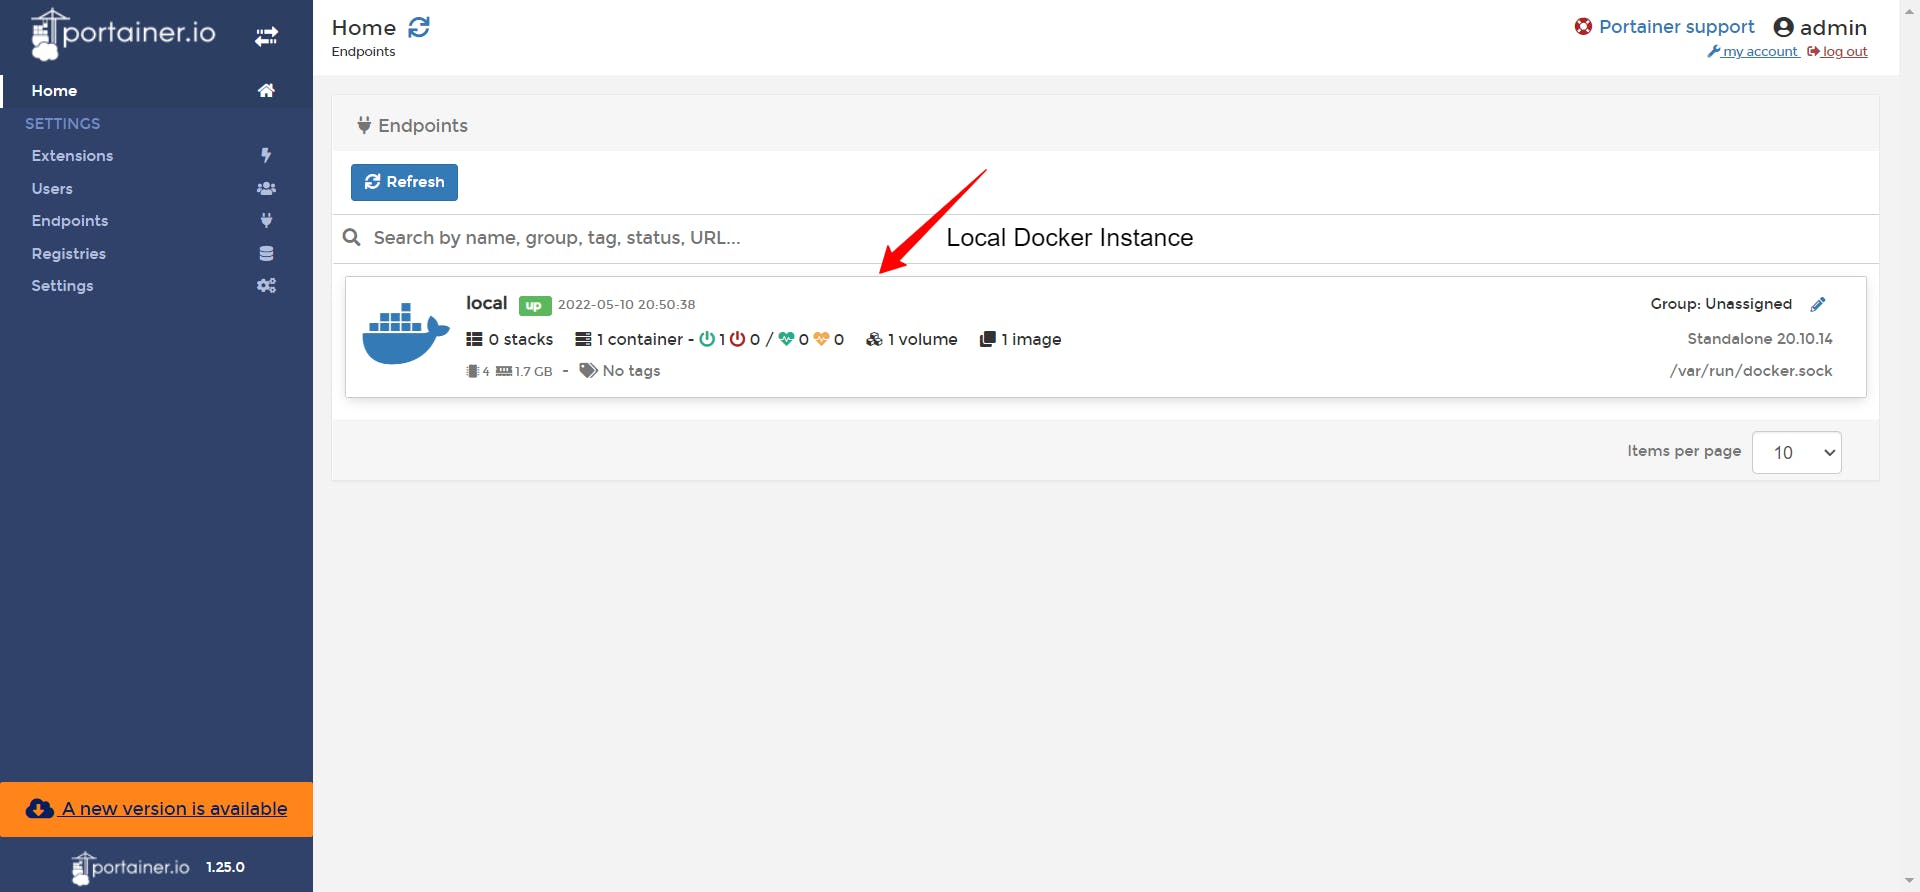
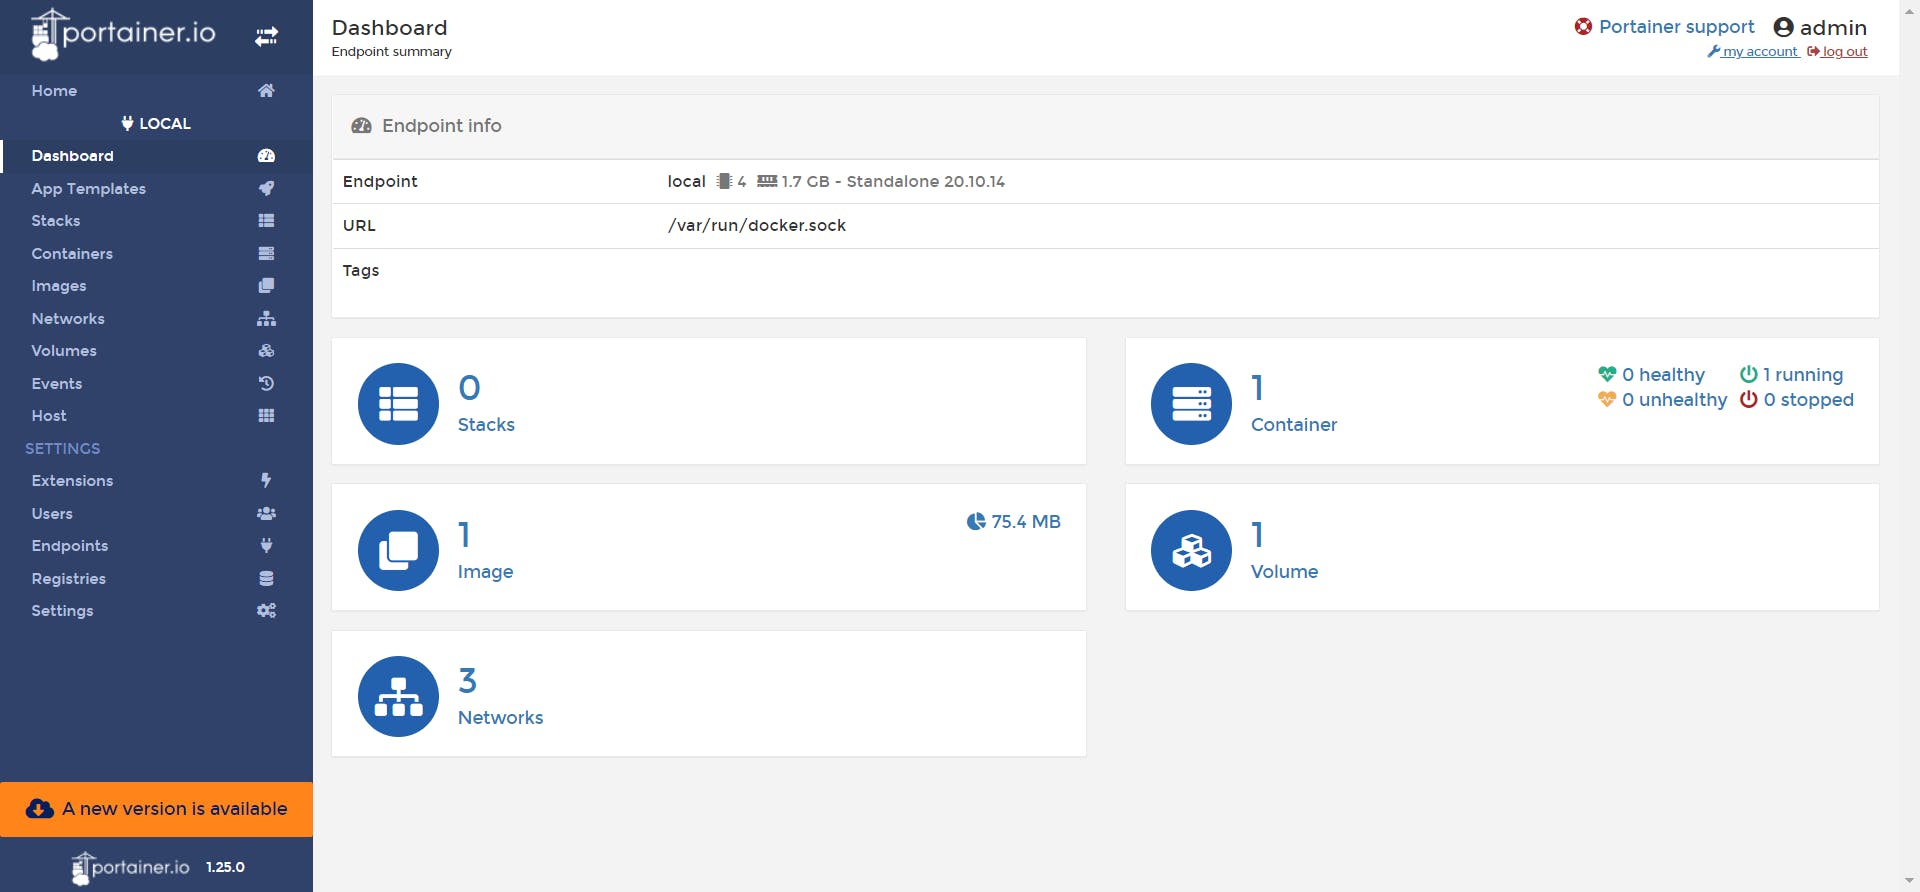
View the Docker dashboard by clicking on the Local Docker instance, which shows a high-level overview of all the Docker processes running currently. If you haven't used Docker before, you don't have much running yet.
It's worth studying Portainer's own configuration options before using it. Click the "Settings" link from the left-hand navigation menu. Portainer security settings can be modified here, along with a custom application logo and the option to opt out of anonymous usage statistics. In most cases, the settings should be fairly intuitive, with the majority focusing on limiting what power is granted to non-administrators.
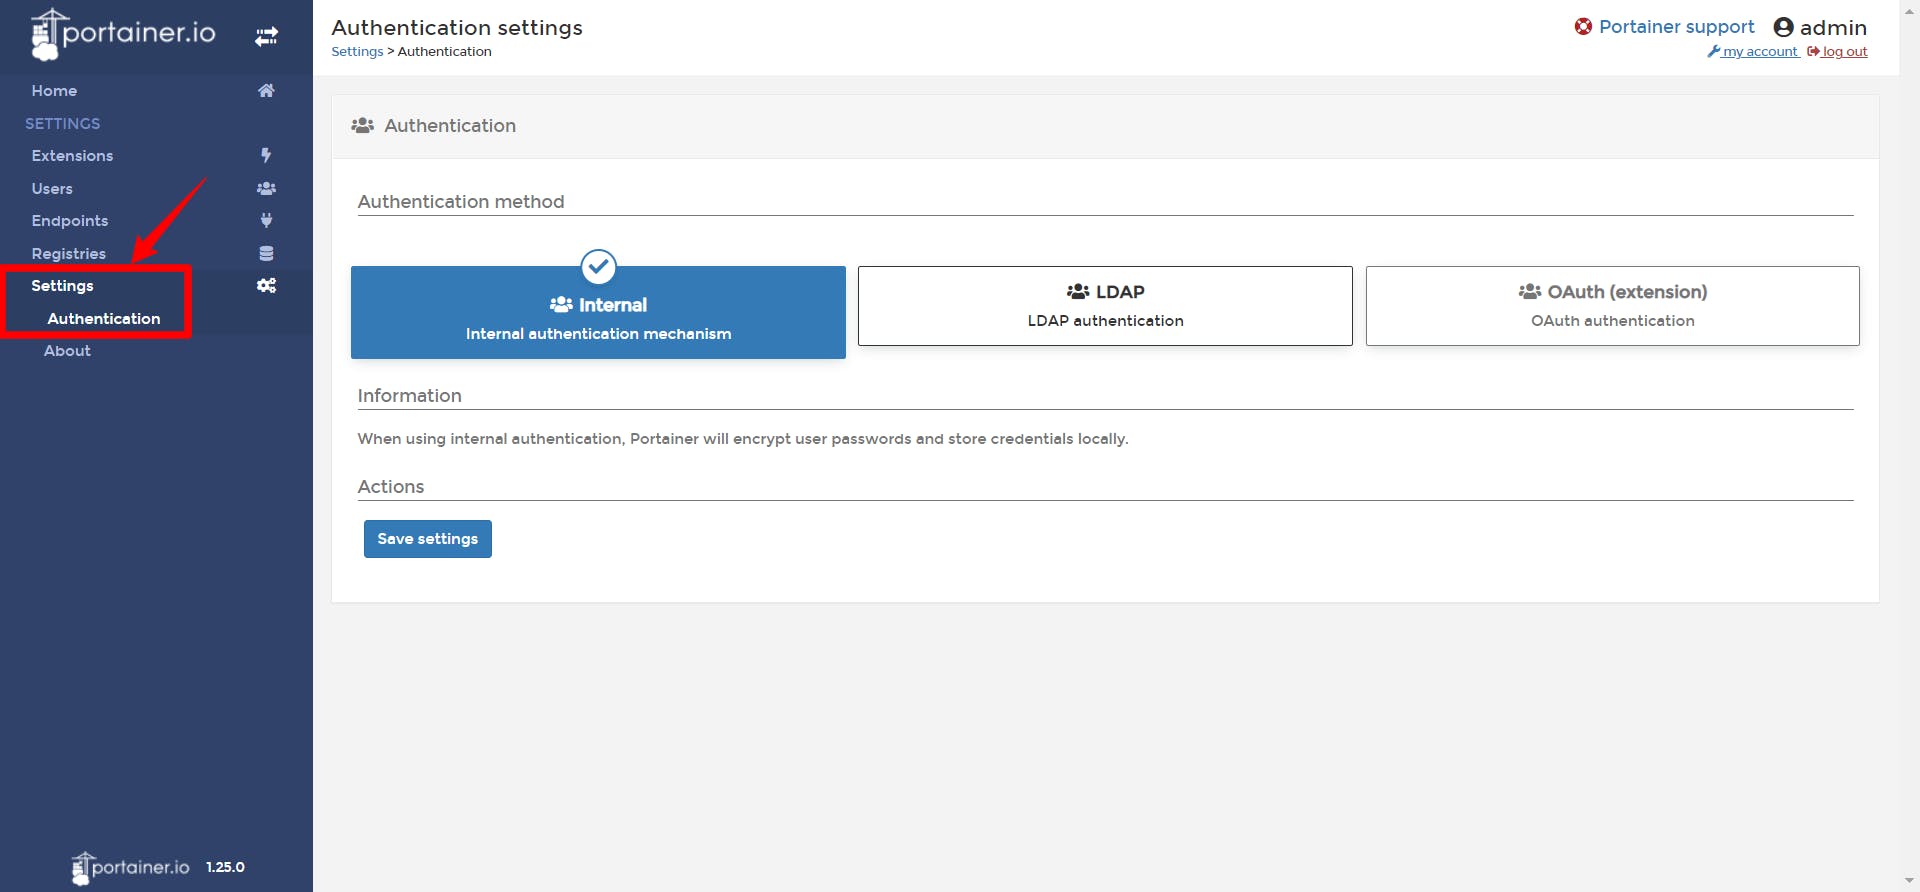
Users can configure how they log in to Portainer through the "Authentication" submenu in the navigation bar. Unless you choose an existing LDAP server or OAuth provider, Porter uses its own internal user management system by default. Set your preferred authentication method by selecting a method and then filling out the fields in the form. On the "Users" page, click the "Add" button to add additional users to a team.
Why Portainer
The reasons to use Portainer are listed below
- It's compact and lightweight
- Simple to use.
- We can use it for monitoring and building Docker applications.
- With this tool, we can see the state of Docker environments in detail.
- It provides us with the capability to manage images, networks, and volumes.
- We can deploy it easily.
- Monitoring of the complete Docker-container environment is easy.
What are the use cases of Portainer
- The Portainer can be used to do the following jobs
- You can manage Docker images using it
- You can quickly deploy applications with the use of app templates
- Management of containers, including start, stop, kill, restart, pause, resume, removing, and creating
- Network managed by adding, removing, and editing
- Adding, removing, and editing permissions for volumes
- Keeping track of docker engine events
- Integrating a custom registry with Docker Hub and adding authentication
- Used for creating endpoints
- Add users to manage Docker
- It can be really helpful in managing a Docker Swarm.
- Create custom templates for containers
Features of Portainer
1. The Authentication feature
User authentication is supported by three different methods in Portainer. First, there is the internal method, in which Portainer takes care of managing users and stores the user data in Portainer. The second method uses LDAP servers, such as ActiveDirectory, which are external to the network and manage users. LDAP authentication has the disadvantage that environment variables cannot be used to configure it. OAuth authentication is the final method of authentication it requires a paid extension

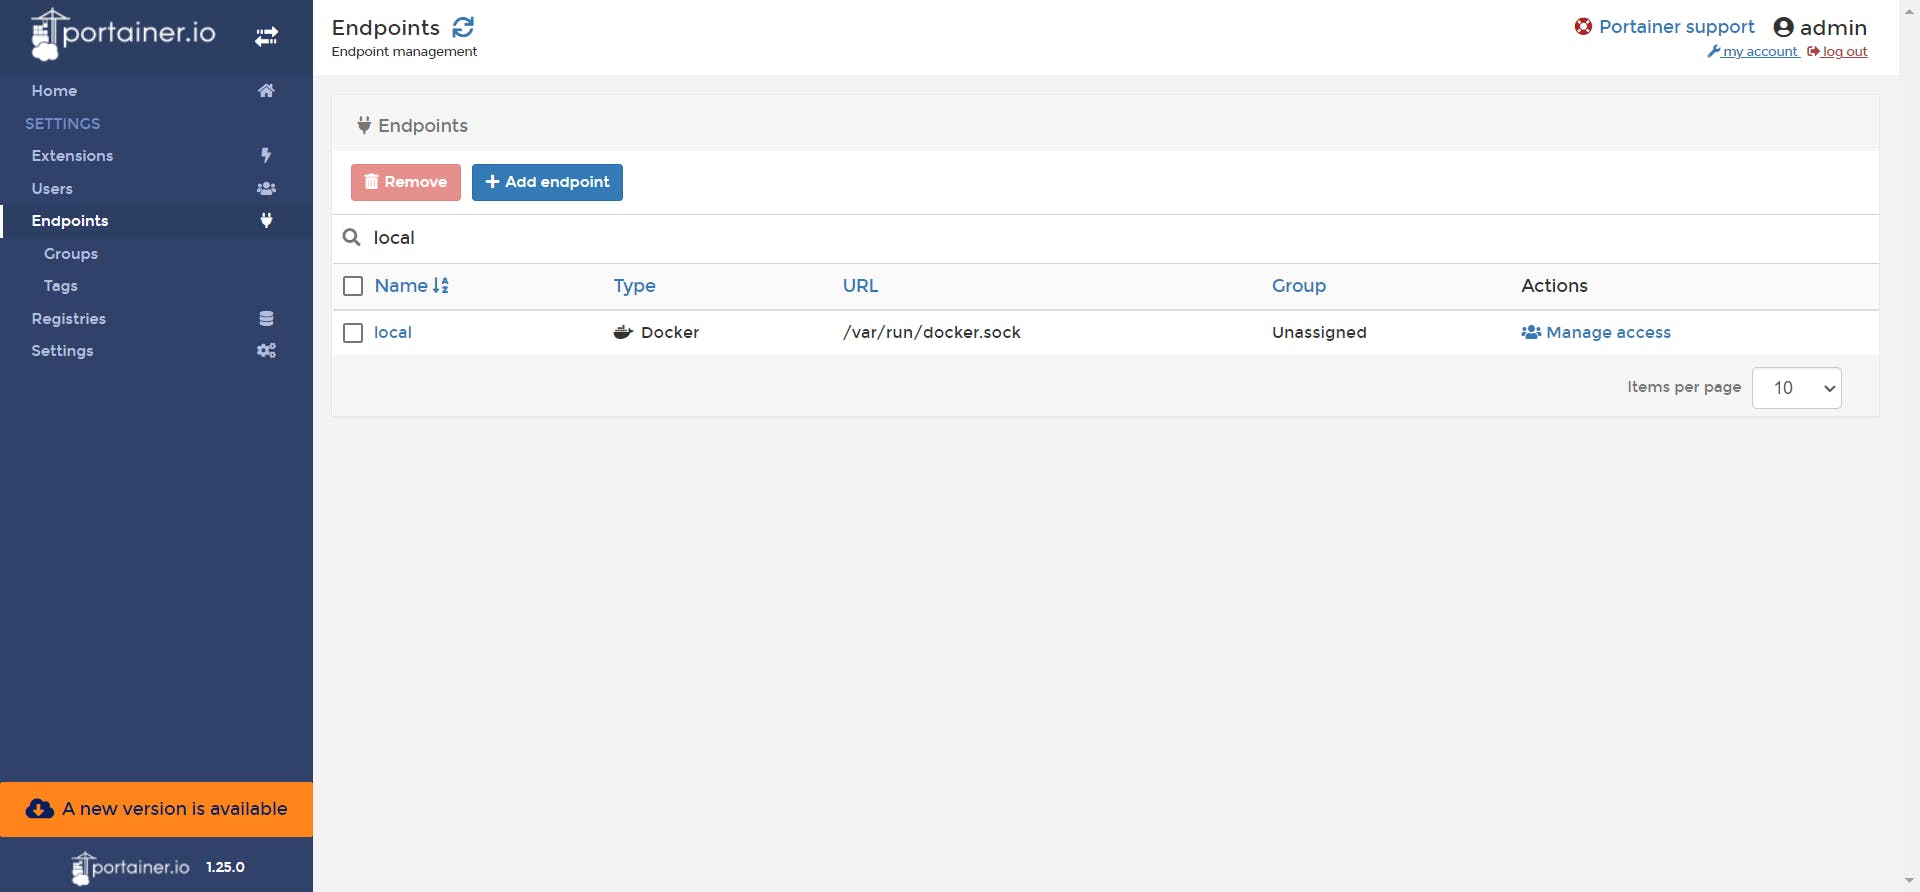
2. Manage multiple endpoints
The user interface in Portainer can be used to manage multiple Docker Swarm clusters (called endpoints), as shown in the image below. In cases when you want to manage clusters across different environments in one interface, this feature is very valuable.
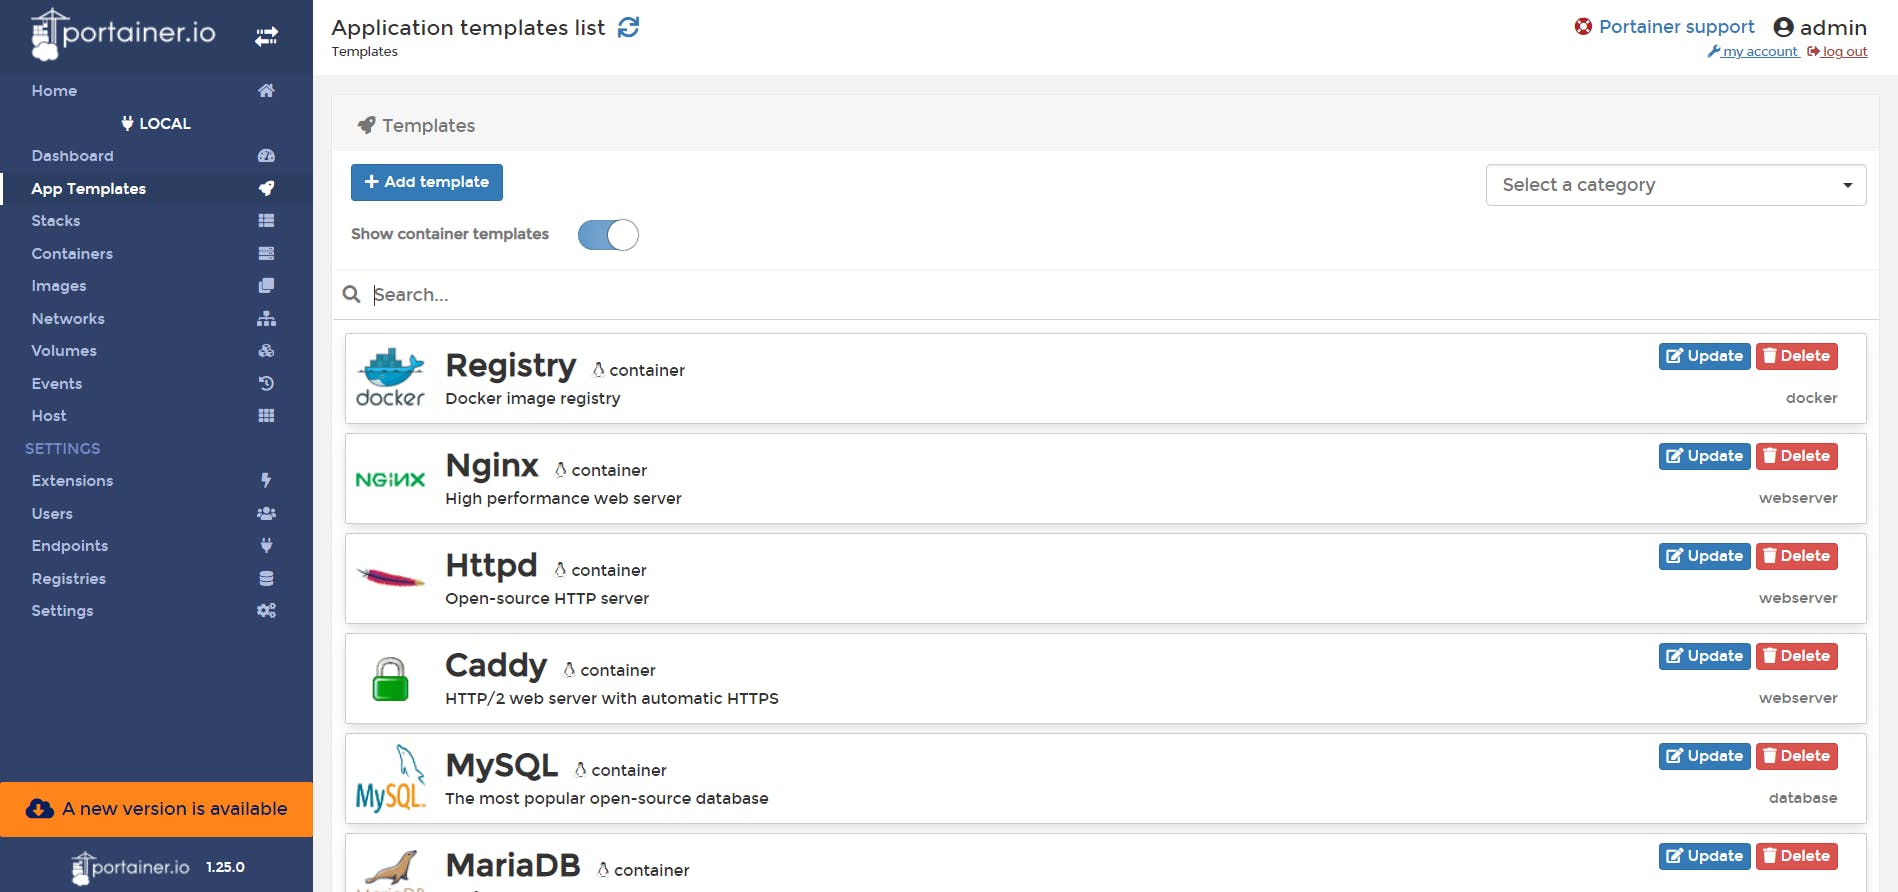
3. The Template feature
Docker Containers and Docker Swarms can be deployed from predefined templates using Container. Portainer includes templates, or end users can define them themselves. There are three ways to deploy services using templates:
- Creating a single Docker container - by defining all the necessary configurations
- Provide a link to the stack or service file for Docker Swarm services
- using the docker-compose fi package
4. View Docker resources
Using this the users can interact with, view, and manage Docker Swarm resources, such as containers, Swarm stacks, support networks, and images.
Portainer makes accessing and interacting with these resources as easy and intuitive as possible. This allows users to validate and check the services and containers without having to connect to clusters and move from node to node. From the web interface, it is possible to search all the services deployed within a given cluster, modify their configuration, and start and stop the services.
5. Perform actions on containers
While it's closely related to the previous feature, I want to highlight the actions that can be performed on containers since they're essential and useful.
Normally, in a Docker Swarm cluster, an engineer needs to perform the following actions in order to inspect a Docker container, check its logs, or connect to the shell inside the container. Begin by connecting to a manager node. Check on which worker node the service's containers are deployed. Perform the required action on the container after connecting to the worker node.
None of these actions are required for hosting Portainer. The same objective can be accomplished via the web interface without connecting to any cluster node.
In addition to the features listed above, Portable includes many more. Nonetheless, the above-mentioned features are some of the most useful options supported by Portainer.
How To Deploy your first application in Portainer
The following section demonstrates how to deploy your first app through the Portainer dashboard.
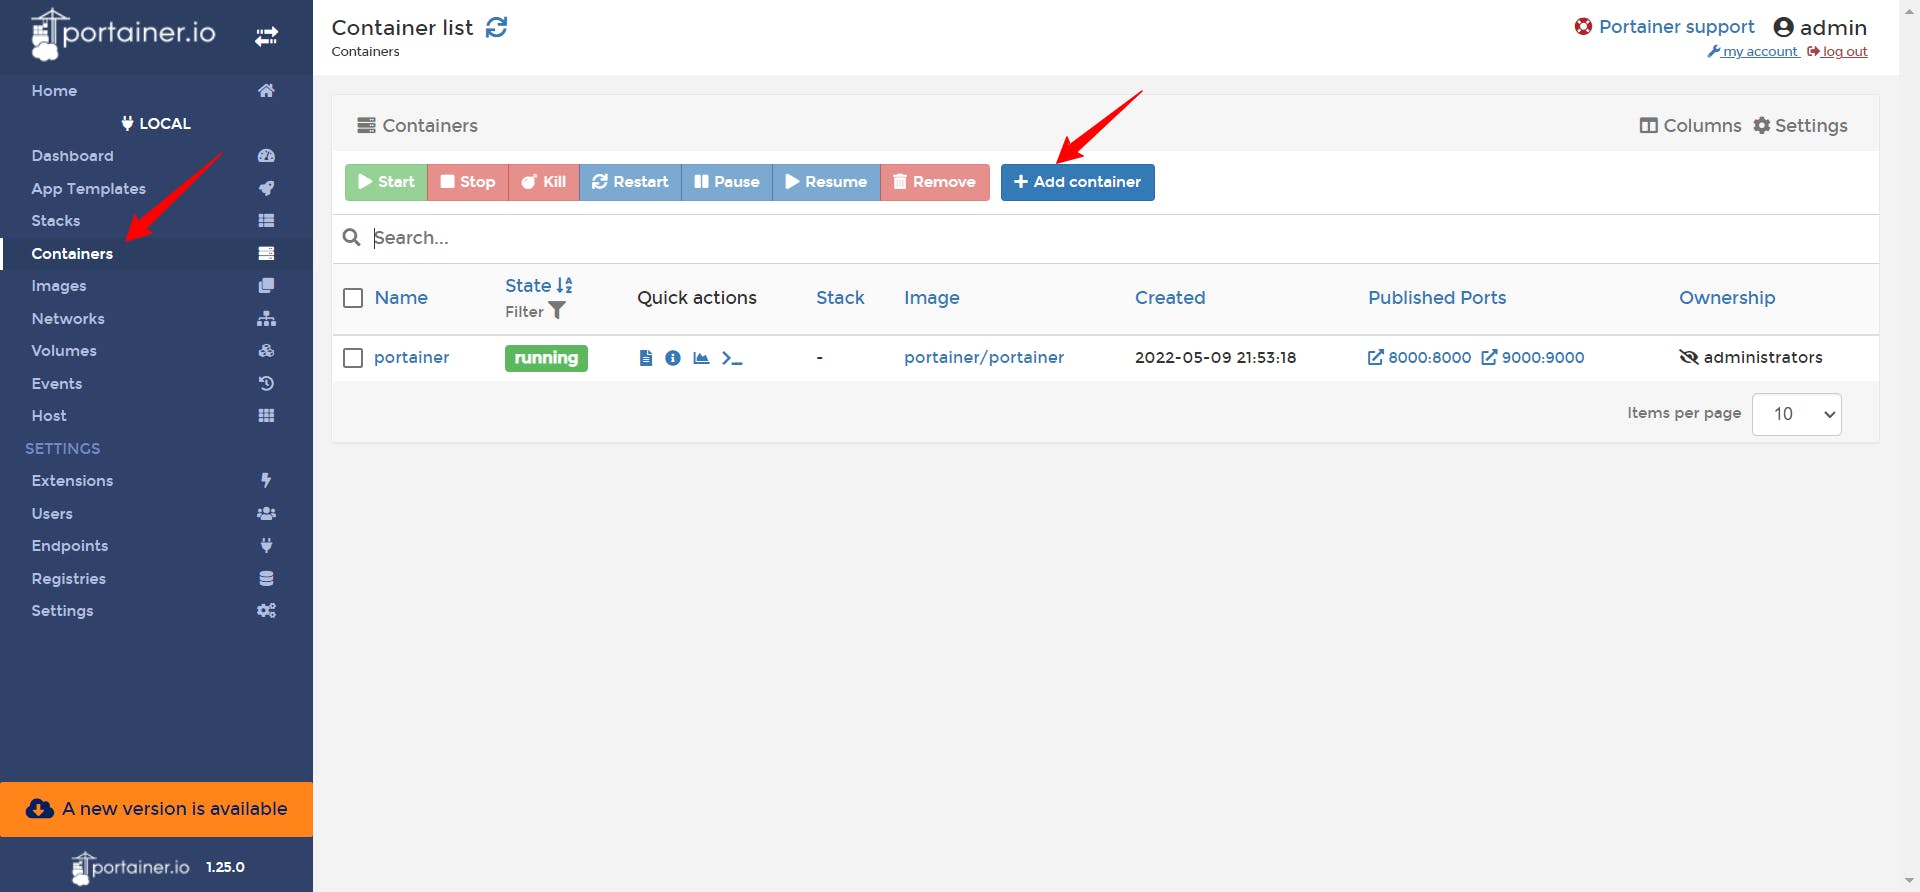
Click Add Container in the Containers menu.
I will use the Nginx web server in this example. Make sure you fill out all the required fields, as in the example below:
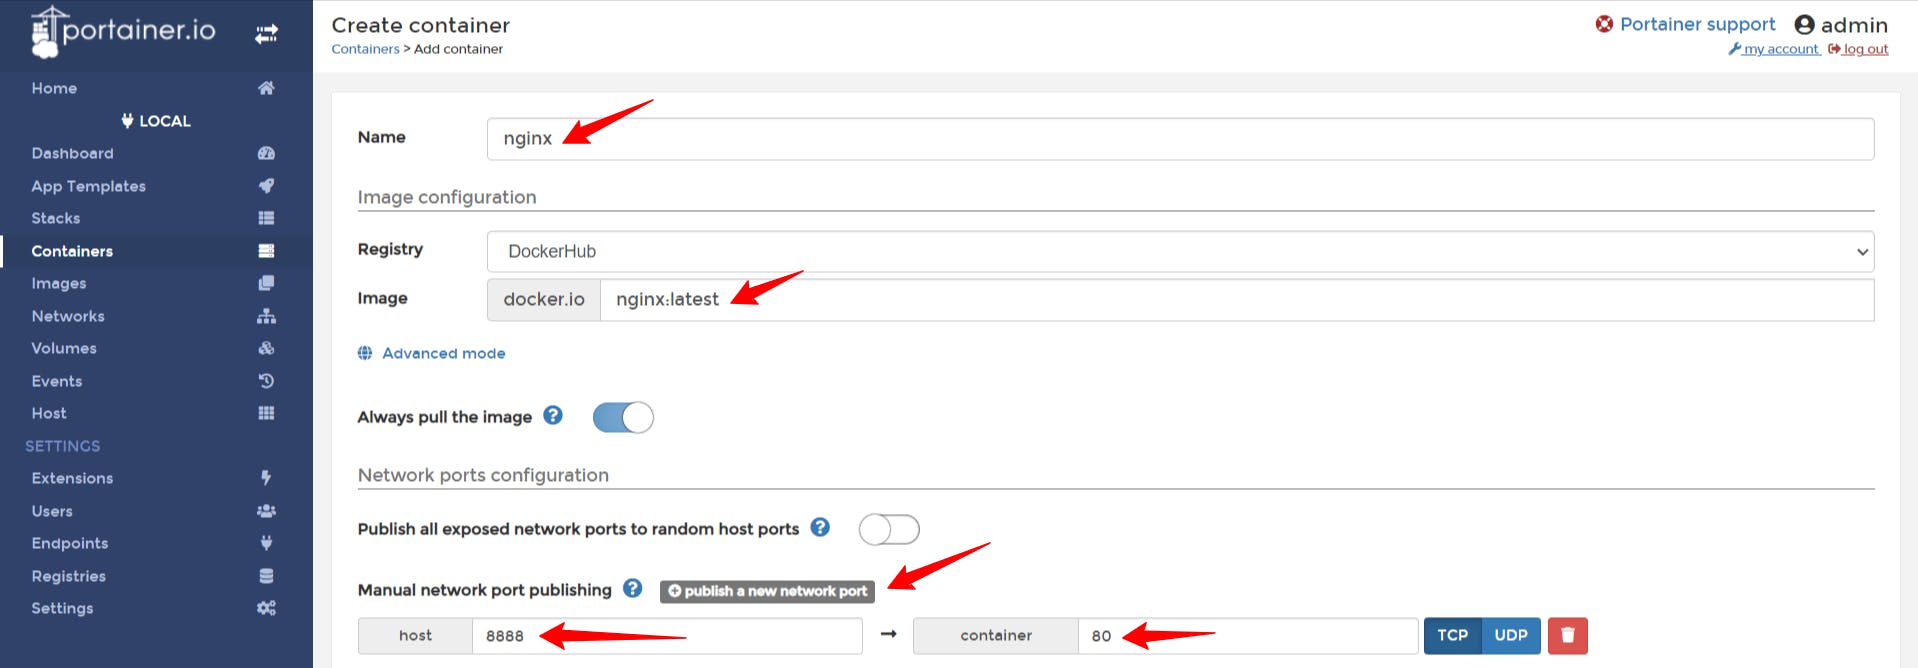
Other than that, I leave it at the default settings. Once the container is deployed, click Finish

You will see your container appear in the list of containers a few seconds after it has been deployed:
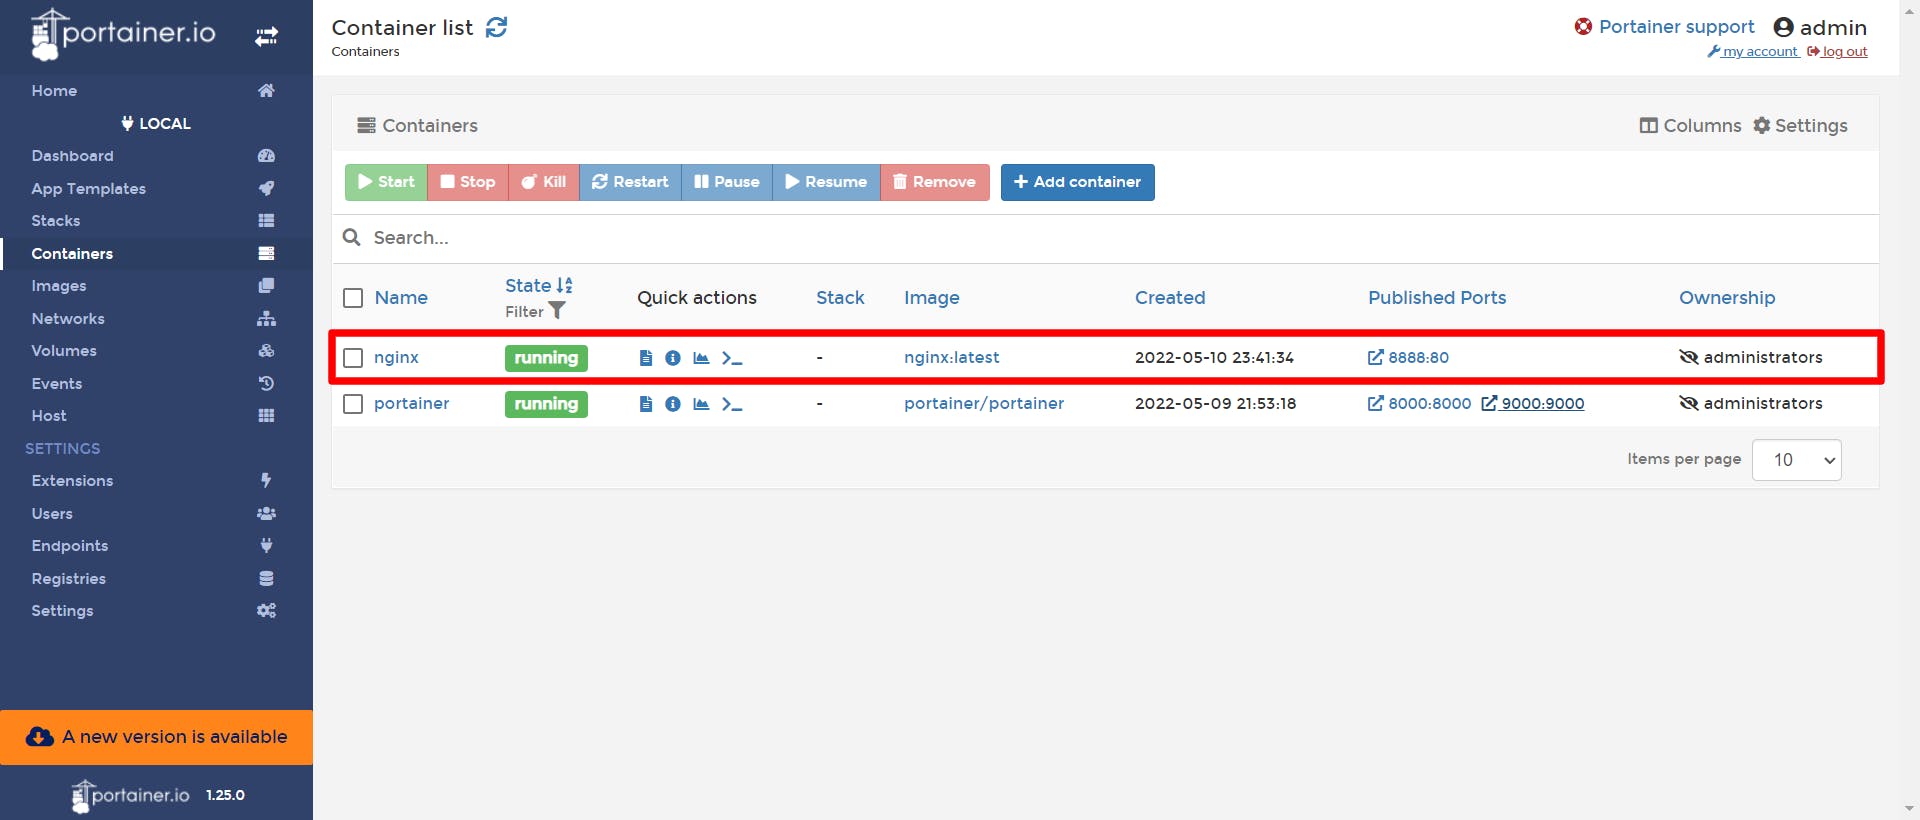
When you access the page, it works!
Conclusion:
Portainer provides a simple and intuitive web-based interface for managing Docker containers, Swarm services, and other resources. The Portainer platform offers a number of free features and paid plugins that can enhance Docker cluster management. So it is worth giving a try do check it out and let me know how it is in the comments below
You can now extend your support by buying me a Coffee.😊👇

If you want to contact me you can do it here:
Thanks for Reading 😊